D Heute habe ich euch Franzi von farbstille auf den Blog eingeladen. Auf ihrem Blog könnt ihr hauptsächlich Beiträge zur Fotografie und zu ihrem Reisen finden, aber es ist auch immer mal wieder Platz für ihre Gedanken und Meinungen. Schaut doch mal bei ihr vorbei.
Eingeladen habe ich sie heute für ein Tutorial zur Makrofotografie. Es gab hier schon einige Tutorials zu diesem Thema, aber das heute soll etwas besonderes sein: Macro Fotografie ohne Macro Objektiv.
Genug von mir, ich übergebe das Wort an Franzi:
"Heute darf ich für euch, zusammen mit Eva, ein Tutorial zur Makrofotografie schreiben. Aber kein gewöhnliches Tutorial hierzu, sondern eines ohne Makroobjektiv, denn ich fotografiere alle meine Makros mit einem gewöhnlichen 18- 55mm f/3.5- 5.6 Objektiv von Canon. Ein richtiges Makroobjektiv ist für mich preislich nicht drin, deswegen improvisiere ich hierfür immer und bin bis jetzt gut klargekommen, auch wenn die Brennweite nicht an die eines richtigen Makroobjektives heranreicht.
Nun zu meinen Tipps:
E Today I invited Franzi from the Blog farbstille. On her blog you can read a lot of posts about photography and traveling and also Franzis opinions and thoughts. Have a look on her blog.
So I invited her today to tell us something about macro photography. Well, I know there were already some Tutorials for this topic, but today will be different, it's all about Macro Photography without a Macro lens. Enough from me, raise the curtains for Franzi:
Today I'm writing a tutorial about Macro Photography for you - together with Eva. But it won't be an ordinary tutorial, because I don't own a macro lens, I do all my photos with the 18-55mm f/3.5- 5.6 lens by Canon. For me a real macro lens is just too expensive and until now I'm happy with my lens - even if the focal length isn't that high.
So now I will tell you some of my tipps:
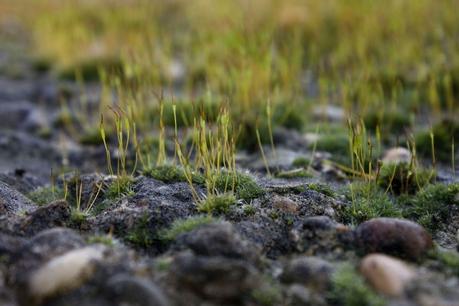
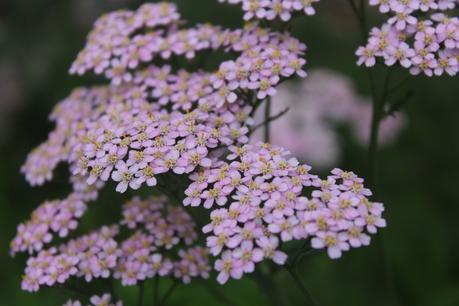
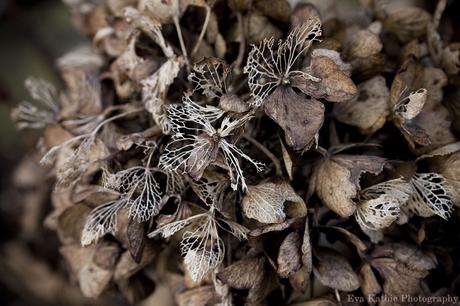
D Zuerst einmal brauchst du natürlich ein Motiv, dass du fotografieren möchtest. In den meisten Fällen ist das schnell gefunden und wir können weiter zum nächsten Punkt. Die Kameraeinstellungen: natürlich kannst du in jedem Modus fotografieren, egal ob Manuell oder Automatik, aber ich für meinen Teil finde den Halbautomatik- Modus - besser bekannt als Av- Modus - am Besten. Da kann ich nämlich immer noch mit Blende, ISO und Co. herumspielen und trotzdem Fotos schießen, bei denen alles automatisch passt. Hierbei musst du bei der Macro Fotografie immer an die Tiefenschärfe denken: umso größer die Blendenzahl, umso größer die Tiefenschärfe.
Ich euch wärmstens empfehlen, manuell zu fokussieren. Denn gerade bei Makros spinnt der Autofokus oft und stellt nicht das Motiv scharf sondern den Hintergrund oder was sonst noch so herumkriecht. Das verbraucht Akkuladung und wenn du Pech hast ist dein, nehmen wir mal den, Schmetterling schon längst weggeflattert.
Apropos, das wäre auch schon das nächste Problem: Wie komme ich nah genug an mein Motiv heran?
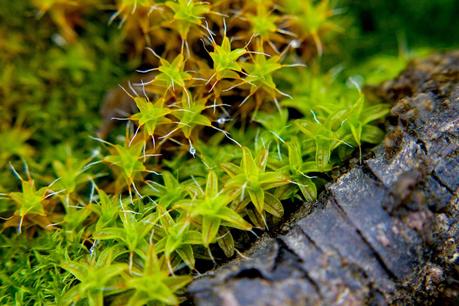
Da muss ich dich leider enttäuschen, dafür gibt es keine 100%ige Anleitung, denn in meinem Fall schmeiße ich mich auch mal auf den Boden, wenn ich ein Motiv ablichten möchte und mir die maximale Brennweite nicht nah genug ist (also ziemlich oft). Völlig egal, wie die Klamotten später aussehen, Hauptsache das Foto sitzt. Trotzdem solltest du, wenn du beispielsweise im Wald unterwegs bist, darauf achten, wohin du dich setzst oder legst. Glaubt mir, Ameisenhaufen sind nicht zum Draufsetzen geeignet. Auch Dornen und Stacheln sind nicht so angenehm, also räum dir eine Fläche frei, bevor du dich motiviert ans Fotografieren machst. Dann musst du einfach versuchen die komplette Brennweite des Objektivs auszunutzen, 55mm sind zum Beispiel gar nicht so wenig, wenn man es bis zum letzten Rest ausnutzt. Also wenn du denkst du bist nah genug, versuch erstmal noch näher ran zugehen.
E Of course first of all you need a motive that you want to photograph. But in most cases you will find one fast. So the next point are the camera settings: you can take your photos in whatever mode you want, no matter manual or automatic, but I think that the half automatic - also known as AV - mode is the best. Here you can set your aperture and ISO yourself. In macro photography you always have to think about the depth of focus: the higher the aperture number, the higher the depth of focus.
I can recommend you to manually focus, because the automatic focus isn't working that good in macro photography. So sometimes the background is sharp and your motive just totally blurred.
So now the next question is: how do I get close enough to my motive?
Sadly I have to disappoint you, because there isn't a 100% instruction for that. In most cases I just lay on the ground and try to get as close as my focal length allows it. If you think you are close enough, go closer. But please be mindful about what you are laying or sitting on, a anthill isn't that funny to sit on.
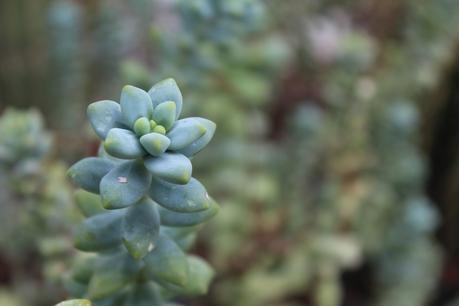
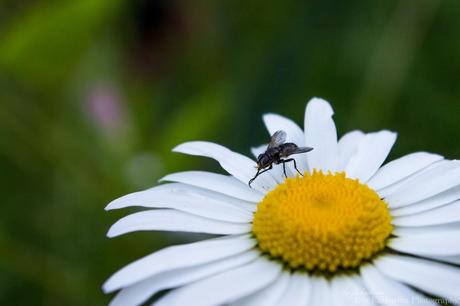
D Nun wie kompensierst du das fehlende Macro Objektiv am besten ohne viel Geld auszugeben?
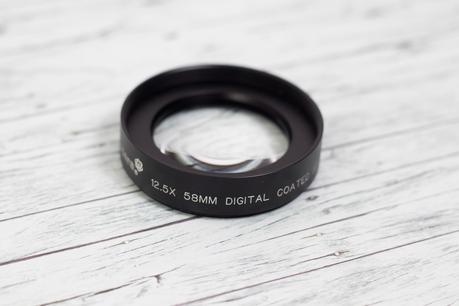
Dafür gibt es zum Beispiel Nahlinsen, wie diese hier von Polaroid . Diese lassen sich wie Filter ganz einfach aufs Objektiv schrauben und haben einen ähnlichen Effekt wie eine Lupe: man kommt sehr viel näher ans Motiv heran. Es gibt dabei verschiedene Werte, ich glaube es geht von 2x bis 10x Vergrößerung. Außerdem soll man sie ganz gut kombinieren - also einfach übereinander schrauben - können.
Auch durch croppen (also zuschneiden) kann man oft noch relativ viel rausholen. Also einfach den gewünschten Ausschnitt des Bildes ausschneiden und somit näher "ranzoomen", bei einer hohen Mega Pixel Zahl der Kamera gar kein Problem.
E But how can you make up for the missing macro lens without giving out much money?
One good example are close-up lenses, for example these from Polaroid . You can just screw them on your lens like a filter and have similar effect to a loupe: you can get much closer to your motive. There are lenses with different values from I think 2x till 10x. And I think you can also combine them.
Another technique is to just crop the picture, or the wished section. With the high mega pixel number of today's cameras that's no problem at all.
D Ein weiteres Problem, das ich ab und zu habe, ist, dass ich das Bild verwackle. Schon allein beim Auslösen passiert das oft. Abhilfe kann hier natürlich ein Stativ schaffen, hier habe ich euch mal meines verlinkt . Es ist vergleichsweise günstig und hat bis jetzt immer seinen Zweck erfüllt. Stative haben allerdings den Nachteil, dass man an einen Ort gebunden ist, d.h. du kannst dem Schmetterling nicht schnell genug hinterherlaufen, da du ja das Stativ zu tragen hast.
Doch was macht man, wenn man ein Motiv auf Bodennähe fotografieren möchte und das Stativ nicht mehr tiefer stellen kann? Ein kleiner Trick, der mir persönlich hilft, kann auch euch helfen - allerdings klappt der nicht immer, warum weiß ich selbst nicht. Nun ja, auf jeden Fall atme ich dann vor dem Auslösen ein und erst wenn ich ausatme löse ich aus. Das stellt mich irgendwie ruhig, sodass ich das Bild nicht verwackle. Außerdem hilft es immer die Kamera etwas auf den Boden aufzustellen, dadurch hat sie einfach einen sichereren Halt. Nutzen kannst du dafür auch größere Steine oder ähnliches.
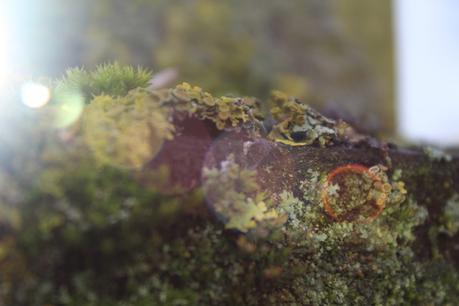
Zum Schluss noch ein kleiner Extratipp: Nutze die Sonne. Ich persönlich habe lange Zeit immer mit Sonnenblende gearbeitet, da ich oft gelesen habe, dass Lichtflecken auf den Bildern als unschön gelten. Na und? Die Sonne lässt euer Bild leuchten und strahlen und solche Lichtflecken haben bei mir schon oft einen schönen Effekt hinterlassen."
E Another problem that I sometimes have is, that I just blur the picture. Even while triggering this happens a lot. A good help for that is a tripod, I will just link you mine here . It is pretty cheap but fulfills its purpose. The only disadvantage of a tripod is, that you are bound to a location, so you can't just walk after your butterfly or something.
So the next thing is: what to do, when the motive is on the ground and you can't lower your tripod that much? A little trick I always try - it doesn't always work - is that I inhale before I push the trigger and then while triggering I exhale. I don't know that just calms me and then I don't blur the picture. Besides it's useful if you set the camera on the ground, where it get's a secure grip. You can use bigger stones of something like that.
In the end a little extra tipp: Use the sun. I worked for a long time with the sun aperture, because I often red that light spots on the pictures are not beautiful. In the end I think it is beautiful because it let your picture shine and the light spots have a nice effect.
D Interessierst du dich für die Fotografie zum kleinen Preis? Noch mehr Tutorial Posts findest du hier.E Interested in Low Budget Photography? You can find more Tutorials here.


Eingeladen habe ich sie heute für ein Tutorial zur Makrofotografie. Es gab hier schon einige Tutorials zu diesem Thema, aber das heute soll etwas besonderes sein: Macro Fotografie ohne Macro Objektiv.
Genug von mir, ich übergebe das Wort an Franzi:
"Heute darf ich für euch, zusammen mit Eva, ein Tutorial zur Makrofotografie schreiben. Aber kein gewöhnliches Tutorial hierzu, sondern eines ohne Makroobjektiv, denn ich fotografiere alle meine Makros mit einem gewöhnlichen 18- 55mm f/3.5- 5.6 Objektiv von Canon. Ein richtiges Makroobjektiv ist für mich preislich nicht drin, deswegen improvisiere ich hierfür immer und bin bis jetzt gut klargekommen, auch wenn die Brennweite nicht an die eines richtigen Makroobjektives heranreicht.
Nun zu meinen Tipps:
E Today I invited Franzi from the Blog farbstille. On her blog you can read a lot of posts about photography and traveling and also Franzis opinions and thoughts. Have a look on her blog.
So I invited her today to tell us something about macro photography. Well, I know there were already some Tutorials for this topic, but today will be different, it's all about Macro Photography without a Macro lens. Enough from me, raise the curtains for Franzi:
Today I'm writing a tutorial about Macro Photography for you - together with Eva. But it won't be an ordinary tutorial, because I don't own a macro lens, I do all my photos with the 18-55mm f/3.5- 5.6 lens by Canon. For me a real macro lens is just too expensive and until now I'm happy with my lens - even if the focal length isn't that high.
So now I will tell you some of my tipps:


D Zuerst einmal brauchst du natürlich ein Motiv, dass du fotografieren möchtest. In den meisten Fällen ist das schnell gefunden und wir können weiter zum nächsten Punkt. Die Kameraeinstellungen: natürlich kannst du in jedem Modus fotografieren, egal ob Manuell oder Automatik, aber ich für meinen Teil finde den Halbautomatik- Modus - besser bekannt als Av- Modus - am Besten. Da kann ich nämlich immer noch mit Blende, ISO und Co. herumspielen und trotzdem Fotos schießen, bei denen alles automatisch passt. Hierbei musst du bei der Macro Fotografie immer an die Tiefenschärfe denken: umso größer die Blendenzahl, umso größer die Tiefenschärfe.
Ich euch wärmstens empfehlen, manuell zu fokussieren. Denn gerade bei Makros spinnt der Autofokus oft und stellt nicht das Motiv scharf sondern den Hintergrund oder was sonst noch so herumkriecht. Das verbraucht Akkuladung und wenn du Pech hast ist dein, nehmen wir mal den, Schmetterling schon längst weggeflattert.
Apropos, das wäre auch schon das nächste Problem: Wie komme ich nah genug an mein Motiv heran?
Da muss ich dich leider enttäuschen, dafür gibt es keine 100%ige Anleitung, denn in meinem Fall schmeiße ich mich auch mal auf den Boden, wenn ich ein Motiv ablichten möchte und mir die maximale Brennweite nicht nah genug ist (also ziemlich oft). Völlig egal, wie die Klamotten später aussehen, Hauptsache das Foto sitzt. Trotzdem solltest du, wenn du beispielsweise im Wald unterwegs bist, darauf achten, wohin du dich setzst oder legst. Glaubt mir, Ameisenhaufen sind nicht zum Draufsetzen geeignet. Auch Dornen und Stacheln sind nicht so angenehm, also räum dir eine Fläche frei, bevor du dich motiviert ans Fotografieren machst. Dann musst du einfach versuchen die komplette Brennweite des Objektivs auszunutzen, 55mm sind zum Beispiel gar nicht so wenig, wenn man es bis zum letzten Rest ausnutzt. Also wenn du denkst du bist nah genug, versuch erstmal noch näher ran zugehen.
E Of course first of all you need a motive that you want to photograph. But in most cases you will find one fast. So the next point are the camera settings: you can take your photos in whatever mode you want, no matter manual or automatic, but I think that the half automatic - also known as AV - mode is the best. Here you can set your aperture and ISO yourself. In macro photography you always have to think about the depth of focus: the higher the aperture number, the higher the depth of focus.
I can recommend you to manually focus, because the automatic focus isn't working that good in macro photography. So sometimes the background is sharp and your motive just totally blurred.
So now the next question is: how do I get close enough to my motive?
Sadly I have to disappoint you, because there isn't a 100% instruction for that. In most cases I just lay on the ground and try to get as close as my focal length allows it. If you think you are close enough, go closer. But please be mindful about what you are laying or sitting on, a anthill isn't that funny to sit on.


D Nun wie kompensierst du das fehlende Macro Objektiv am besten ohne viel Geld auszugeben?
Dafür gibt es zum Beispiel Nahlinsen, wie diese hier von Polaroid
Auch durch croppen (also zuschneiden) kann man oft noch relativ viel rausholen. Also einfach den gewünschten Ausschnitt des Bildes ausschneiden und somit näher "ranzoomen", bei einer hohen Mega Pixel Zahl der Kamera gar kein Problem.
E But how can you make up for the missing macro lens without giving out much money?
One good example are close-up lenses, for example these from Polaroid
Another technique is to just crop the picture, or the wished section. With the high mega pixel number of today's cameras that's no problem at all.


D Ein weiteres Problem, das ich ab und zu habe, ist, dass ich das Bild verwackle. Schon allein beim Auslösen passiert das oft. Abhilfe kann hier natürlich ein Stativ schaffen, hier habe ich euch mal meines verlinkt
Doch was macht man, wenn man ein Motiv auf Bodennähe fotografieren möchte und das Stativ nicht mehr tiefer stellen kann? Ein kleiner Trick, der mir persönlich hilft, kann auch euch helfen - allerdings klappt der nicht immer, warum weiß ich selbst nicht. Nun ja, auf jeden Fall atme ich dann vor dem Auslösen ein und erst wenn ich ausatme löse ich aus. Das stellt mich irgendwie ruhig, sodass ich das Bild nicht verwackle. Außerdem hilft es immer die Kamera etwas auf den Boden aufzustellen, dadurch hat sie einfach einen sichereren Halt. Nutzen kannst du dafür auch größere Steine oder ähnliches.
Zum Schluss noch ein kleiner Extratipp: Nutze die Sonne. Ich persönlich habe lange Zeit immer mit Sonnenblende gearbeitet, da ich oft gelesen habe, dass Lichtflecken auf den Bildern als unschön gelten. Na und? Die Sonne lässt euer Bild leuchten und strahlen und solche Lichtflecken haben bei mir schon oft einen schönen Effekt hinterlassen."
E Another problem that I sometimes have is, that I just blur the picture. Even while triggering this happens a lot. A good help for that is a tripod, I will just link you mine here
So the next thing is: what to do, when the motive is on the ground and you can't lower your tripod that much? A little trick I always try - it doesn't always work - is that I inhale before I push the trigger and then while triggering I exhale. I don't know that just calms me and then I don't blur the picture. Besides it's useful if you set the camera on the ground, where it get's a secure grip. You can use bigger stones of something like that.
In the end a little extra tipp: Use the sun. I worked for a long time with the sun aperture, because I often red that light spots on the pictures are not beautiful. In the end I think it is beautiful because it let your picture shine and the light spots have a nice effect.


D Interessierst du dich für die Fotografie zum kleinen Preis? Noch mehr Tutorial Posts findest du hier.E Interested in Low Budget Photography? You can find more Tutorials here.


