D Heute hole ich mir aus mangelnder Erfahrung meiner selbst mal wieder einen Gastblogger ins Haus, für ein Tutorial das nicht nur für Fotografievernahte von großem Wert sein sollte sondern für jeden Blogger: wie funktioniert gute Produktfotografie?
Wie gesagt habe ich selbst nicht so viel Erfahrung damit und habe mich daher nach dem passenden Gastblogger umgeschaut und sie schließlich auch gefunden, Vorhang auf für Jasmin von "Mein gehäkeltes Herz":
Produktfotografie für Blogger
Gute Fotos lassen jeden Blog gut wirken. Stellen wir uns mal vor, alle Blogs bestünden nur aus reinem Text. Was bei politischen oder philosophischen Themen noch ganz machbar ist, kommt spätestens beim Versuch ein Review über den „hübschen beerenroten Lippenstift mit einem Hauch von blau und lila“ an seine Grenzen. Daher sind Produktfotos das A und O und erleichtern dem Leser zu verstehen, was gemeint ist. Für vernünftige Produktfotos braucht ihr nicht unbedingt ein teures Studio oder eine Profiausrüstung- heute verrate ich euch ein paar Tipps wie ihr schöne Fotos für euren Blog schießen könnt.
E I just don't have enough knowledge by myself to write a tutorial about this topic, so I thought: lets get some one who knows what she does. So I asked Jasmin from "Mein gehäkeltes Herz" to write a tutorial about productphotography. A topic that is worth knowing for every blogger. Raise the curtains for Jasmin:
Productphotography for bloggers
Every blog needs good photos. Let's imagine that every blog would just be a lot of text and nothing else. For political or philosophic topics that would be okay, but at the latest when you try to write a review about this "beautiful berryred lipstick with a little bit blue and purple" you get on the hilt. So product photos are really important and make it easier for the reader to know what you are talking about. For good productphotos you don't even need a expensive photostudio or professional equipment - today I will tell you some tipps how you can make pretty photos for your blog.
D Kenne deine Kamera
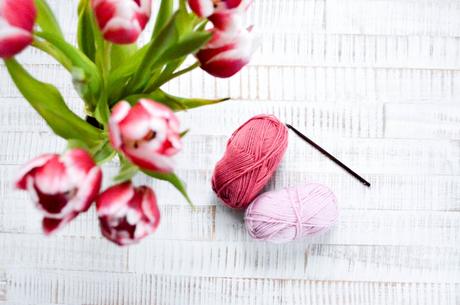
Es gibt verschiedenste Kameratypen, aber egal womit ihr arbeitet, eine Faustregel gilt immer - auch wenn das wie ein Oberlehrerspruch klingt, wirklich gute Fotos macht nur der, der seine Kamera in- und auswendig kennt. Nur wenn ihr genau wisst, wie eure Kamera funktioniert, was sie kann, aber auch wo ihre Schwächen liegen, könnt ihr das Maximum aus dem jeweiligen Modell herausholen. Ihr müsst im Mindesten wissen, welcher Modus geeignet ist, wie (und ob) ihr Blende, Belichtung und Co manuell einstellen könnt- nur so könnt ihr später eventuelle Fehler oder Macken effektiv ausgleichen. Ihr müsst nicht unbedingt viel Geld für eine teure Spiegelreflexkamera ausgeben. Auch mit dem Handy könnt ihr wirklich gute Fotos machen. Allerdings gilt als Faustregel, je kompakter die Kamera, desto schwieriger wird es schlechte Lichtverhältnisse auszugleichen - die Handykamera hat beispielsweise bestimmte Vorzüge, leider neigen die Bilder dazu bei schlechten Lichtverhältnissen etwas grisselig zu werden oder die Farbnuancen zu verzerren.
Kramt also die Gebrauchsanleitung raus, oder sucht im Internet nach Tipps und Tricks und macht euch mit den verschiedenen Modi und Einstellungen vertraut.
E Know your camera
There are a lot of different camera types, but no matter with what you are working there is one rule of thumb - also this sounds like a teachersentence, you can only make good photos when you know your camera really good. You need to know the different functions, what weaknesses it has and stuff like that. Only than you can get the peak out of your camera. At least you have to know which modi are suitable and how (or if) you set aperture, exposure time and so one - only with that knowledge you can later compensate mistakes and blemishes.
You don't desperately need a expensive camera, eben with your phone you can take some good pictures. But one thing is important: the more compact your camera is, the more difficult it is to deal with bad lighting conditions - a phone camera maybe has it's advantages, but with a bad light the photos get grainy and the colors look bad.
So take out your manuals or browse the internet for tips how to use your camera and it's different modes and settings.
D Nehmt euch Zeit
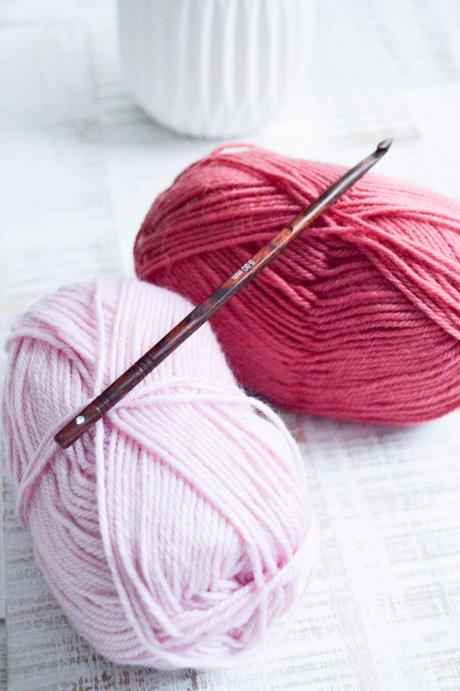
Das Gute an der Produktfotografie ist: die Produkte laufen im Normalfall nicht weg und sind auch sonst sehr geduldig. Nehmt euch am Anfang Zeit um viel auszuprobieren, mit den Einstellungen zu spielen, Hintergründe zu wechseln, verschiedene Winkel zur Aufnahme zu nutzen. Wir leben zum Glück im Zeitalter der digitalen Fotografie und sind nicht mehr auf 36 Bilder pro Film limitiert, die erst einmal entwickelt werden müssen - wenn ihr zu Beginn also pro Motiv 40 oder mehr Bilder verschießt ist das gar kein Problem.
Schaut euch auch die Fotos, die ihr gemacht habt ganz genau an - wie ist die Belichtung, sind die Bilder unscharf, sind die Bilder zu hell, zu dunkel? Anfangs kostet das wirklich etwas Zeit, aber es lohnt sich wirklich, denn je öfter ihr das macht, desto geübter werdet ihr und desto besser könnt ihr einschätzen, wie die Bilder werden sollen.
Findet euren eigenen Stil
Es gibt zig Möglichkeiten gute Fotos aufzunehmen, wichtig ist aber, dass ihr euren eigenen Stil findet. Schaut euch Fotos anderer gut an, findet heraus, welcher Stil euch gefällt. Mögt ihr klare Fotos mit hellem Hintergrund und wenig Deko oder seid ihr eher der Typ für ein etwas aufwendigeres Set.
Produktfotos für einen Blog unterscheiden sich ein wenig von denen, die für Shops genutzt werden. Auch wenn es bei beiden Arten wichtig ist, einen guten Eindruck vom Produkt zu vermitteln, ist es beim Blog wichtiger, dass das Produkt die Leser auf einer emotionalen Ebene anspricht. Dennoch gilt bei Produktfotos allgemein- das Produkt muss hell, möglichst unverfälscht und ansprechend präsentiert werden.
E Find your own style
There are a lot of possibilities to take good pictures but it's important to find your own style. Look at the pictures of other people and find out which style you like. Do you like plain photos with a light background and just a few decoration or pictures with a more sophisticated set?
Productphotos for blogs do distinguish a little bit from photos that are used in shops. In both areas it's important to give a good impression of the product, but on blogs it's more important to address the reader emotionally with your photo. Nevertheless a productphoto needs to be bright and preferably genuine.
Take your time
One good thing at productphotograhy is: your products doesn't run away and they are pretty patient. So take your time and try new things, play with the settings, change the backgrounds, use new angles and stuff like that. Luckily we live in the time of digital photography and you don't have a film limited on 36 pictures that have to be developed. So it's no problem to take 40 or more pictures of one motive.
Also look very closely at the pictures you made - how is the exposure, are they sharp, are they to dark or the light? At the beginning it costs some time but it really is worth that, because you are getting better and you can later easier estimate how your picture should be.
 D 1. Hintergründe und Deko
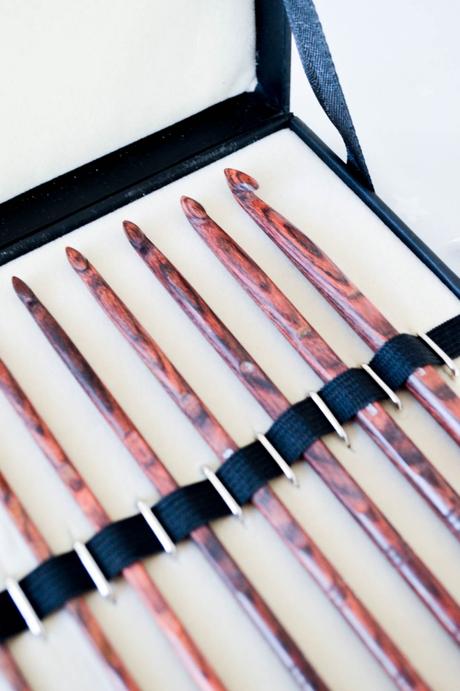
Zunächst einmal muss der Bereich, den ihr als Hintergrund auswählt sauber und leer von allen störenden Elementen sein. Alles, was nichts mit dem Produkt zu tun hat oder nicht dazu passt sollte nicht auf dem Foto erscheinen. Für jedes Produkt gibt es eine Reihe von passenden Dekoelementen. Eine schöne Tasse macht gleich noch mehr her, wenn sie mit einem heißen Getränk und einem Gebäckstück garniert ist - oder ihr sie in der Hand haltet.
Ein gut ausgewählter Hintergrund entscheidet, wie ein Produkt wirkt. Im Zweifel tut ihr immer gut daran einen neutralen Hintergrund zu wählen - der Hintergrund soll für das Produkt arbeiten und nicht dagegen. Ein zu bunter oder auffällig gemusterter Hintergrund lenkt in der Regel vom eigentlichen Produkt ab. Ich persönlich bevorzuge helle Hintergründe, eine Naturstruktur von Schiefer oder Holz kann aber auch in Kombination mit Produkten, die einen sehr klaren Look haben einen schönen Effekt erzielen.
Es lohnt sich die Augen nach Hintergründen offen zu halten. Diese müssen nicht teuer sein - weißer, schwarzer, hellgrauer Tonkarton sind die günstigste Alternative. Dann gibt es noch selbstklebende Folien, Tapeten und Holzuntergründe. Eine kleine Sammlung kommt irgendwann ganz automatisch zusammen.
E 1. Background and Decoration
First of all your area that you want to choose as background needs to be clean and empty from every annoying element. Everything that doesn't match to the product shouldn't be on your photo, for every product there are some decoration elements that fit. For example a cup looks good with a hot drink in it and a cookie next to it - or if you just have it in your hand.
A good selected background can change how a product appeals. In case of doubt you can always choose a neutral background - it should work with the product and not against it. A colorful background with conspicuous patterns normally just distracts people. I personally like bright backgrounds and the natural structure of slate and wood in combination with products that have a clear look can make a nice effect, too.
Keep your eyes open for good backgrounds. They don't have to be expensive - white, black or grey cardboard can be a great alternative. And than there are also adhesive transparencies, wallpapers and wood undergrounds. You will fast have a little selection.
D 2. Belichtung
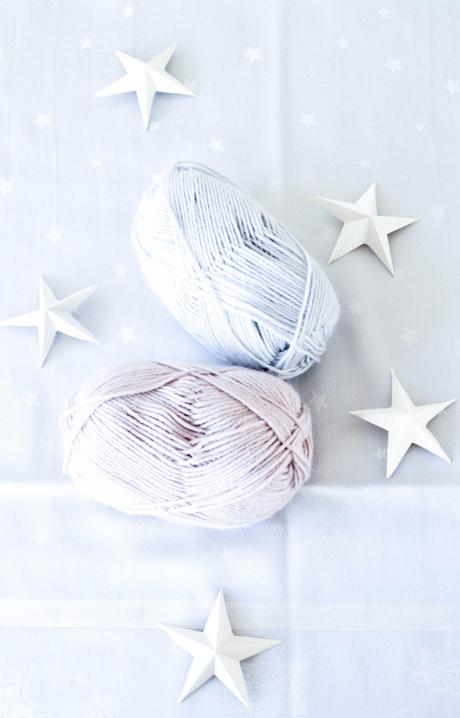
Licht ist ein unglaublich wichtiger Faktor- es verändert Farben und den Schattenwurf und kann für ein Produkt entweder Segen oder Fluch sein. Künstliches Licht, besonders wenn es einen Farbstich hat oder nicht gleichmäßig aufs Produkt fällt kann alle Mühe kaputt machen. Auch mit dem besten Bildbearbeitungsprogramm lassen sich solche Makel nur schwer wieder herausarbeiten. Am besten fotografiert ihr bei natürlichem Tageslicht. Achtet darauf, dass ihr nicht in der direkten Mittagssonne steht, da sonst Schatten eurer Produkt zu hart erscheinen lassen können- oder die Unterschiede zwischen hellen und dunklen Stellen in einem Bild die spätere Bearbeitung nur unnötig verkomplizieren.
Nutzt ihr Tageslichtlampen achtet darauf, dass die Lampen eine gute Qualität haben - nur so vermeidet ihr ungewollte Farbstiche. Zudem solltet ihr darauf achten, dass ihr das Produkt gleichmäßig beleuchtet. Um auch jeden Winkel richtig auszuleuchten könnt ihr zudem Reflektoren nutzen.
Wenn ihr ein bisschen geschickt seid, könnt ihr euch auch eine eigene Lightbox bauen - quasi ein Minifotostudio - die eignet sich besonders für kleinere Produkte. Die Anleitungen hierfür findet ihr zu hauf im Internet.
3. Bearbeitung
So toll die riesige Auswahl an Filtern, Rahmen und allem möglichen ist - und so sehr sie andere Fotos aufwerten können im Bereich Produktfotografie gilt: Finger weg von allem, was die Originalfarbe des Produktes verfälschen könnte.
Eure wichtigsten Tools für die Bildbearbeitung sind Helligkeits- und Kontrastkorrektur, sowie der nachträgliche Weißabgleich. Behaltet immer im Hinterkopf, Bildbearbeitung für Produktfotos soll das Produkt möglichst realitätsnah darstellen. Probiert in Ruhe aus, welche Software für euch funktioniert.
E 2. Exposure
Light is really important for your picture, it changes the colors and shadows can be a blessing or curse for your product. Artificial light, particularly when it has a tint or doesn't expose your product consistent can ruin your picture. Even with the best image editing program it's hard to change such big things. So it's best to photograph in natural daylight. Take care to not stand in the direct midday sun, that also causes shadows and the differences between light and dark parts can complicate your editing.
If you use daylight lamps watch out, that the lamp has a good quality to avoid bad tints. Also you have to expose your product consistent with it. To expose every angle of the product you can use reflectors.
You can also build your own lightbox, which is like a little photostudio and is great for small products. There are a lot of instructions for that in the internet.
3. Editing
In productphotograhy you should take your hands off everything that sophisticates the original color of your product. So don't use the big selection of filters, frames and stuff like that.
Your most important tool for the image editing is the brightness and contrast correction and the white balance. Always take in mind that your photo should be as realistic as possible, because you want to show the product as it is. Take your time and try out which software is best for you.
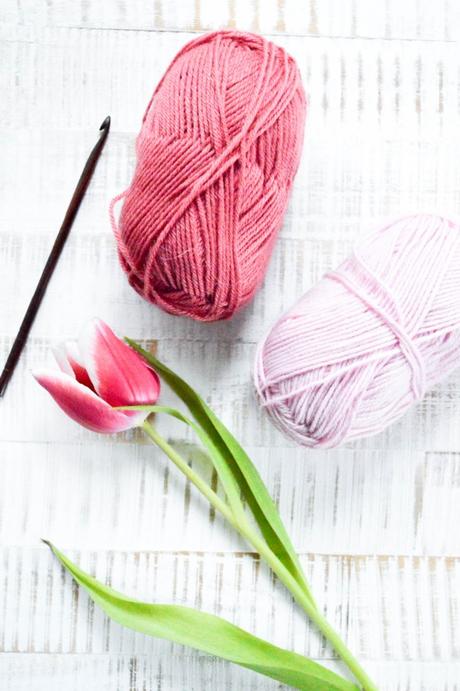
D Weitere Tipps:
Nutzt ein Stativ: Verwackelte Fotos sind ein No-Go, besonders wenn ihr Detailaufnahmen von Strukturen plant. Ein Stativ kann helfen - nehmt ihr noch einen Fernauslöser, könnt ihr eure Fotos wackelfrei aufnehmen. Zudem kann die verlängerte Belichtungszeit die ihr so gewinnt, schlechtere Lichtverhältnisse ausgleichen.
Reflektoren: Reflektoren sind gut um das Produkt gleichmäßig zu belichten und unschöne Schatten zu mindern. Die günstigste Variante ist eine Platte mit Gold- oder Silberfolie bezogen. Aber auch im Internet finden sich zahlreiche günstige Varianten. Ich selber nutze einen Reflektor, der mich ungefähr 20€ gekostet hat- und ich möchte ihn nicht mehr missen.
E Some more tips:
Use a tripod: blurred pictures are No-Go's, especially when they are detail pictures of structures. A tripod with a remote release can make it easier to take nice and sharp pictures. In addition you can use a high exposure time with a tripod and so you can compensate bad light conditions.
Reflectors: reflectors are good to expose your product consistent and decline unpleasant shadows. The cheapest version is a slab with gold- and silverfoil. You can find affordable reflectors in the internet. I use a reflector that costed about 20€ and I don't want to miss it anymore.


Wie gesagt habe ich selbst nicht so viel Erfahrung damit und habe mich daher nach dem passenden Gastblogger umgeschaut und sie schließlich auch gefunden, Vorhang auf für Jasmin von "Mein gehäkeltes Herz":
Produktfotografie für Blogger
Gute Fotos lassen jeden Blog gut wirken. Stellen wir uns mal vor, alle Blogs bestünden nur aus reinem Text. Was bei politischen oder philosophischen Themen noch ganz machbar ist, kommt spätestens beim Versuch ein Review über den „hübschen beerenroten Lippenstift mit einem Hauch von blau und lila“ an seine Grenzen. Daher sind Produktfotos das A und O und erleichtern dem Leser zu verstehen, was gemeint ist. Für vernünftige Produktfotos braucht ihr nicht unbedingt ein teures Studio oder eine Profiausrüstung- heute verrate ich euch ein paar Tipps wie ihr schöne Fotos für euren Blog schießen könnt.
E I just don't have enough knowledge by myself to write a tutorial about this topic, so I thought: lets get some one who knows what she does. So I asked Jasmin from "Mein gehäkeltes Herz" to write a tutorial about productphotography. A topic that is worth knowing for every blogger. Raise the curtains for Jasmin:
Productphotography for bloggers
Every blog needs good photos. Let's imagine that every blog would just be a lot of text and nothing else. For political or philosophic topics that would be okay, but at the latest when you try to write a review about this "beautiful berryred lipstick with a little bit blue and purple" you get on the hilt. So product photos are really important and make it easier for the reader to know what you are talking about. For good productphotos you don't even need a expensive photostudio or professional equipment - today I will tell you some tipps how you can make pretty photos for your blog.

D Kenne deine Kamera
Es gibt verschiedenste Kameratypen, aber egal womit ihr arbeitet, eine Faustregel gilt immer - auch wenn das wie ein Oberlehrerspruch klingt, wirklich gute Fotos macht nur der, der seine Kamera in- und auswendig kennt. Nur wenn ihr genau wisst, wie eure Kamera funktioniert, was sie kann, aber auch wo ihre Schwächen liegen, könnt ihr das Maximum aus dem jeweiligen Modell herausholen. Ihr müsst im Mindesten wissen, welcher Modus geeignet ist, wie (und ob) ihr Blende, Belichtung und Co manuell einstellen könnt- nur so könnt ihr später eventuelle Fehler oder Macken effektiv ausgleichen. Ihr müsst nicht unbedingt viel Geld für eine teure Spiegelreflexkamera ausgeben. Auch mit dem Handy könnt ihr wirklich gute Fotos machen. Allerdings gilt als Faustregel, je kompakter die Kamera, desto schwieriger wird es schlechte Lichtverhältnisse auszugleichen - die Handykamera hat beispielsweise bestimmte Vorzüge, leider neigen die Bilder dazu bei schlechten Lichtverhältnissen etwas grisselig zu werden oder die Farbnuancen zu verzerren.
Kramt also die Gebrauchsanleitung raus, oder sucht im Internet nach Tipps und Tricks und macht euch mit den verschiedenen Modi und Einstellungen vertraut.
E Know your camera
There are a lot of different camera types, but no matter with what you are working there is one rule of thumb - also this sounds like a teachersentence, you can only make good photos when you know your camera really good. You need to know the different functions, what weaknesses it has and stuff like that. Only than you can get the peak out of your camera. At least you have to know which modi are suitable and how (or if) you set aperture, exposure time and so one - only with that knowledge you can later compensate mistakes and blemishes.
You don't desperately need a expensive camera, eben with your phone you can take some good pictures. But one thing is important: the more compact your camera is, the more difficult it is to deal with bad lighting conditions - a phone camera maybe has it's advantages, but with a bad light the photos get grainy and the colors look bad.
So take out your manuals or browse the internet for tips how to use your camera and it's different modes and settings.

D Nehmt euch Zeit
Das Gute an der Produktfotografie ist: die Produkte laufen im Normalfall nicht weg und sind auch sonst sehr geduldig. Nehmt euch am Anfang Zeit um viel auszuprobieren, mit den Einstellungen zu spielen, Hintergründe zu wechseln, verschiedene Winkel zur Aufnahme zu nutzen. Wir leben zum Glück im Zeitalter der digitalen Fotografie und sind nicht mehr auf 36 Bilder pro Film limitiert, die erst einmal entwickelt werden müssen - wenn ihr zu Beginn also pro Motiv 40 oder mehr Bilder verschießt ist das gar kein Problem.
Schaut euch auch die Fotos, die ihr gemacht habt ganz genau an - wie ist die Belichtung, sind die Bilder unscharf, sind die Bilder zu hell, zu dunkel? Anfangs kostet das wirklich etwas Zeit, aber es lohnt sich wirklich, denn je öfter ihr das macht, desto geübter werdet ihr und desto besser könnt ihr einschätzen, wie die Bilder werden sollen.
Findet euren eigenen Stil
Es gibt zig Möglichkeiten gute Fotos aufzunehmen, wichtig ist aber, dass ihr euren eigenen Stil findet. Schaut euch Fotos anderer gut an, findet heraus, welcher Stil euch gefällt. Mögt ihr klare Fotos mit hellem Hintergrund und wenig Deko oder seid ihr eher der Typ für ein etwas aufwendigeres Set.
Produktfotos für einen Blog unterscheiden sich ein wenig von denen, die für Shops genutzt werden. Auch wenn es bei beiden Arten wichtig ist, einen guten Eindruck vom Produkt zu vermitteln, ist es beim Blog wichtiger, dass das Produkt die Leser auf einer emotionalen Ebene anspricht. Dennoch gilt bei Produktfotos allgemein- das Produkt muss hell, möglichst unverfälscht und ansprechend präsentiert werden.
E Find your own style
There are a lot of possibilities to take good pictures but it's important to find your own style. Look at the pictures of other people and find out which style you like. Do you like plain photos with a light background and just a few decoration or pictures with a more sophisticated set?
Productphotos for blogs do distinguish a little bit from photos that are used in shops. In both areas it's important to give a good impression of the product, but on blogs it's more important to address the reader emotionally with your photo. Nevertheless a productphoto needs to be bright and preferably genuine.
Take your time
One good thing at productphotograhy is: your products doesn't run away and they are pretty patient. So take your time and try new things, play with the settings, change the backgrounds, use new angles and stuff like that. Luckily we live in the time of digital photography and you don't have a film limited on 36 pictures that have to be developed. So it's no problem to take 40 or more pictures of one motive.
Also look very closely at the pictures you made - how is the exposure, are they sharp, are they to dark or the light? At the beginning it costs some time but it really is worth that, because you are getting better and you can later easier estimate how your picture should be.
 D 1. Hintergründe und Deko
 Zunächst einmal muss der Bereich, den ihr als Hintergrund auswählt sauber und leer von allen störenden Elementen sein. Alles, was nichts mit dem Produkt zu tun hat oder nicht dazu passt sollte nicht auf dem Foto erscheinen. Für jedes Produkt gibt es eine Reihe von passenden Dekoelementen. Eine schöne Tasse macht gleich noch mehr her, wenn sie mit einem heißen Getränk und einem Gebäckstück garniert ist - oder ihr sie in der Hand haltet.
Ein gut ausgewählter Hintergrund entscheidet, wie ein Produkt wirkt. Im Zweifel tut ihr immer gut daran einen neutralen Hintergrund zu wählen - der Hintergrund soll für das Produkt arbeiten und nicht dagegen. Ein zu bunter oder auffällig gemusterter Hintergrund lenkt in der Regel vom eigentlichen Produkt ab. Ich persönlich bevorzuge helle Hintergründe, eine Naturstruktur von Schiefer oder Holz kann aber auch in Kombination mit Produkten, die einen sehr klaren Look haben einen schönen Effekt erzielen.
Es lohnt sich die Augen nach Hintergründen offen zu halten. Diese müssen nicht teuer sein - weißer, schwarzer, hellgrauer Tonkarton sind die günstigste Alternative. Dann gibt es noch selbstklebende Folien, Tapeten und Holzuntergründe. Eine kleine Sammlung kommt irgendwann ganz automatisch zusammen.
E 1. Background and Decoration
First of all your area that you want to choose as background needs to be clean and empty from every annoying element. Everything that doesn't match to the product shouldn't be on your photo, for every product there are some decoration elements that fit. For example a cup looks good with a hot drink in it and a cookie next to it - or if you just have it in your hand.
A good selected background can change how a product appeals. In case of doubt you can always choose a neutral background - it should work with the product and not against it. A colorful background with conspicuous patterns normally just distracts people. I personally like bright backgrounds and the natural structure of slate and wood in combination with products that have a clear look can make a nice effect, too.
Keep your eyes open for good backgrounds. They don't have to be expensive - white, black or grey cardboard can be a great alternative. And than there are also adhesive transparencies, wallpapers and wood undergrounds. You will fast have a little selection.

D 2. Belichtung
Licht ist ein unglaublich wichtiger Faktor- es verändert Farben und den Schattenwurf und kann für ein Produkt entweder Segen oder Fluch sein. Künstliches Licht, besonders wenn es einen Farbstich hat oder nicht gleichmäßig aufs Produkt fällt kann alle Mühe kaputt machen. Auch mit dem besten Bildbearbeitungsprogramm lassen sich solche Makel nur schwer wieder herausarbeiten. Am besten fotografiert ihr bei natürlichem Tageslicht. Achtet darauf, dass ihr nicht in der direkten Mittagssonne steht, da sonst Schatten eurer Produkt zu hart erscheinen lassen können- oder die Unterschiede zwischen hellen und dunklen Stellen in einem Bild die spätere Bearbeitung nur unnötig verkomplizieren.
Nutzt ihr Tageslichtlampen achtet darauf, dass die Lampen eine gute Qualität haben - nur so vermeidet ihr ungewollte Farbstiche. Zudem solltet ihr darauf achten, dass ihr das Produkt gleichmäßig beleuchtet. Um auch jeden Winkel richtig auszuleuchten könnt ihr zudem Reflektoren nutzen.
Wenn ihr ein bisschen geschickt seid, könnt ihr euch auch eine eigene Lightbox bauen - quasi ein Minifotostudio - die eignet sich besonders für kleinere Produkte. Die Anleitungen hierfür findet ihr zu hauf im Internet.
3. Bearbeitung
So toll die riesige Auswahl an Filtern, Rahmen und allem möglichen ist - und so sehr sie andere Fotos aufwerten können im Bereich Produktfotografie gilt: Finger weg von allem, was die Originalfarbe des Produktes verfälschen könnte.
Eure wichtigsten Tools für die Bildbearbeitung sind Helligkeits- und Kontrastkorrektur, sowie der nachträgliche Weißabgleich. Behaltet immer im Hinterkopf, Bildbearbeitung für Produktfotos soll das Produkt möglichst realitätsnah darstellen. Probiert in Ruhe aus, welche Software für euch funktioniert.
E 2. Exposure
Light is really important for your picture, it changes the colors and shadows can be a blessing or curse for your product. Artificial light, particularly when it has a tint or doesn't expose your product consistent can ruin your picture. Even with the best image editing program it's hard to change such big things. So it's best to photograph in natural daylight. Take care to not stand in the direct midday sun, that also causes shadows and the differences between light and dark parts can complicate your editing.
If you use daylight lamps watch out, that the lamp has a good quality to avoid bad tints. Also you have to expose your product consistent with it. To expose every angle of the product you can use reflectors.
You can also build your own lightbox, which is like a little photostudio and is great for small products. There are a lot of instructions for that in the internet.
3. Editing
In productphotograhy you should take your hands off everything that sophisticates the original color of your product. So don't use the big selection of filters, frames and stuff like that.
Your most important tool for the image editing is the brightness and contrast correction and the white balance. Always take in mind that your photo should be as realistic as possible, because you want to show the product as it is. Take your time and try out which software is best for you.

D Weitere Tipps:
Nutzt ein Stativ: Verwackelte Fotos sind ein No-Go, besonders wenn ihr Detailaufnahmen von Strukturen plant. Ein Stativ kann helfen - nehmt ihr noch einen Fernauslöser, könnt ihr eure Fotos wackelfrei aufnehmen. Zudem kann die verlängerte Belichtungszeit die ihr so gewinnt, schlechtere Lichtverhältnisse ausgleichen.
Reflektoren: Reflektoren sind gut um das Produkt gleichmäßig zu belichten und unschöne Schatten zu mindern. Die günstigste Variante ist eine Platte mit Gold- oder Silberfolie bezogen. Aber auch im Internet finden sich zahlreiche günstige Varianten. Ich selber nutze einen Reflektor, der mich ungefähr 20€ gekostet hat- und ich möchte ihn nicht mehr missen.
E Some more tips:
Use a tripod: blurred pictures are No-Go's, especially when they are detail pictures of structures. A tripod with a remote release can make it easier to take nice and sharp pictures. In addition you can use a high exposure time with a tripod and so you can compensate bad light conditions.
Reflectors: reflectors are good to expose your product consistent and decline unpleasant shadows. The cheapest version is a slab with gold- and silverfoil. You can find affordable reflectors in the internet. I use a reflector that costed about 20€ and I don't want to miss it anymore.


