D Als ich angefangen habe Macro zu fotografieren - oder eher als ich endlich mein Macro Objektiv, die Sigma 105mm Festbrennweite, hatte - war ich erstmal ziemlich schockiert: jedes meiner Bilder war total verwackelt und hässlich. Vorher hatte ich immer gedacht, das Problem hier wäre, dass mein Superzoom Objektiv nun mal nicht für diese Fotografierichtung gemacht ist, aber als ich dann endlich ein Macro Objektiv hatte waren die Fotos noch tausendmal schlimmer als je zuvor. Als ich andere Fotografen gefragt habe ob sie wissen wo das Problem liege, schien es so als wüsste jeder Mensch der Welt wie Macrofotografie funktioniert, aber niemand hatte es mir jemals erzählt. Also dachte ich mir nun, da ich etwas Training in diesem Gebiet hatte, alles ausprobiert habe und eine Idee habe wie es funktioniert, will ich euch ein paar Sachen darüber erzählen, die ich damals auch gern gewusst hätte.
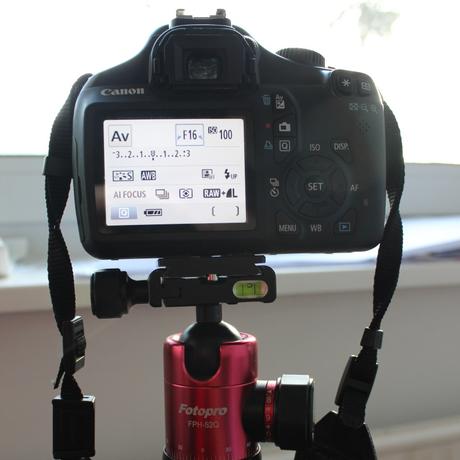
Mein erster Tipp: versucht niemals Macro Fotos ohne ein Stativ zu machen. Ich musste das auf die harte Weise lernen. Ohne ein Stativ sind die Bilder nämlich meistens total verwackelt oder unscharf und man kann keine hohe Blendenzahl verwenden, was man aber für eine gute Tiefenschärfe braucht - dazu komme ich später noch mal. Also nochmal: immer wenn ihr Macro Fotos machen wollt, nehmt ein Stativ mit. Eine schöne Alternative dafür ist übrigens der "Green Pod", der vor allem für Fotos nah am Boden unschlagbar ist. Das ist quasi ein hartes Kissen auf das die Kamera geschnallt und festgeschraubt wird.
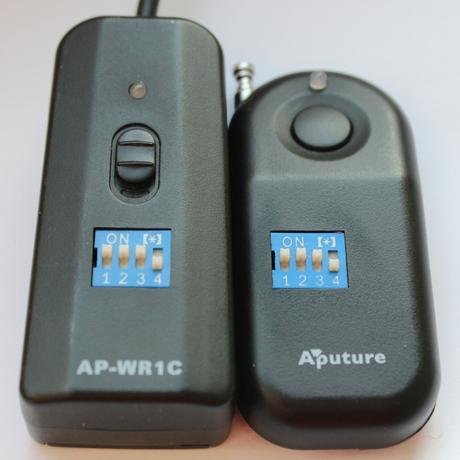
Das nächste was ihr für wirklich scharfe Bilder braucht ist ein Fernauslöser. Beim Macro Fotografieren ist die Kamera sehr empfindlich für Erschütterungen, sogar die winzig kleine die ihr macht, wenn ihr den Auslöser direkt an der Kamera drückt. Wenn ihr also richtig scharfe Bilder wollt, solltet ihr immer einen Fernauslöser zu diesem Zwecke benutzen. Glücklicherweise findet man davon billige Modelle z.B. auf amazon.
E When I started to do macro photography - well more when I first had my macro lens, the sigma 105mm fixed focal length - I was shocked: every picture I made was blurred and ugly. Before that I always thought the problem is, that I didn't have a macro lens and my superzoom lens is just not made for macro photography. But than I finally had this macro lens and the photos were even worse. When I asked other photographers what the problem is, it seemed like everybody knew how macro photography works, but nobody ever told me. So I think, now that I had some training in macro photography, tried everything and have an idea how it works, I want to tell you some little things that nobody ever told me but I would have loved if somebody did.
First of all: never ever try to photograph macro without a tripod. I had to learn this the hard way. Without a tripod the pictures are often blurred and you can't use a high aperture number, which you have to because you want to have a high depth of focus - what I will explain later in this post. So always take a tripod with you when you want to do macro photography. Another nice gadget that can replace a tripod for example when you do macro photography on the floor is the green pod.Which is some kind of hard pillow on that you can strap the camera.
Next thing you really need is a remote release. In macro photography the camera is really sensitive for shakes, even the one little shake you make, when you click the release of your camera. So if you want a really sharp picture you should use a remote release. Luckily there are pretty cheep models for example on amazon.
 D Nun haben wir die Basis des Ganzen, aber welche Kameraeinstellungen sind sinnvoll?
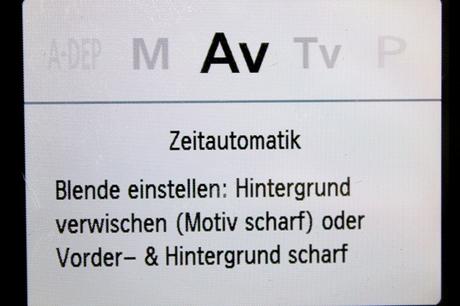
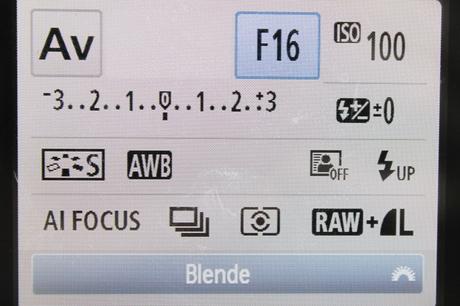
Mit einem Stativ - das ihr wie ich schon gesagt habe auf jeden Fall benutzen solltet - nehme ich auf jeden Fall immer die tiefste ISO - bei meiner Kamera ist das 100 -, damit spart ihr euch ein unnötiges Rauschen und mit dem Stativ müsst ihr auch nicht über die Belichtungszeit nachdenken. Das ist auch einer der Gründe weshalb ich Macro meist im AV Modus fotografiere - mehr über Kamera Modi findet ihr übrigens in einem meiner älteren Posts, hier. Der andere Grund ist, dass ich die Blende auf eine hohe Zahl setzen möchte, nämlich f11 oder sogar höher. Damit erzeugen wir eine hohe Tiefenschärfe, was bei Macro Fotografie richtig toll aussieht.
Und ich betone nochmal: wegen dem Fernauslöser und dem Stativ könnt ihr diese Einstellungen benutzen ohne über eine hohe Belichtungszeit nachzudenken, also macht euch keine Gedanken wenn die Kamera einige Zeit braucht um das Bild zu machen.
E Now we have the basis, but what camera settings should you use?
With a tripod - which you have to use like I already said - I always choose the lowest ISO of my camera which is 100, because than the picture don't have unnecessary noise and with a tripod you don't have to mind about the exposure time. That's also one reason why I always use the AV mode for macro photography - read more about camera modes in one of my older posts, here . The other reason is, that I want to set a aperture with a high number like f11 or even higher. With that setting we get a high depth of focus, which looks great at macro photography.
Because of the remote release and tripod you can do this setting without minding the long exposure time with this setting, so don't mind if the camera takes a lot of time to take a picture.
D Nächste Frage: Was tun, wenn sich das Motiv bewegt?
Das ist immer ein Problem, wenn man draußen Macros fotografieren möchte: wegen dem Wind bewegt sich die schöne Blume oder noch schlimmer: man möchte ein Tier fotografieren, z.B. eine Fliege. Also muss man die Einstellungen draußen natürlich anpassen, erstmal muss man die ISO erhöhen und dann die Blendenzahl kleiner werden lassen - aber nicht zu klein gehen, schließlich wollen wir in der Macro Fotografie eine hohe Tiefenschärfe. Mit diesen Einstellungen haben wir nun wahrscheinlich ein Rauschen im Bild und weniger Tiefenschärfe, das ist der Grund weshalb ich beispielsweise Blumen gerne drinnen in meinem improvisierten Studio fotografiere. Über mein eigenes kleines Studio habe ich vor einem kurzen Weilchen schonmal geschrieben, den Post findet ihr hier.
E The next question is: What do I do when my theme is moving?
That's always a problem when you do macro photography outside: because of wind the beautiful flower moves or you even want to photograph an moving animal like a fly. So you have to adjust the settings outside, you have to lower the aperture number - but don't go to low, because you want a high depth of focus in macro photography - and use a higher ISO. Than you may get some noise and less depth of focus, that's why I like to photograph flowers and stuff like that inside in a little homestudio. I already wrote a post about my personal little homestudio, have a look on it here.
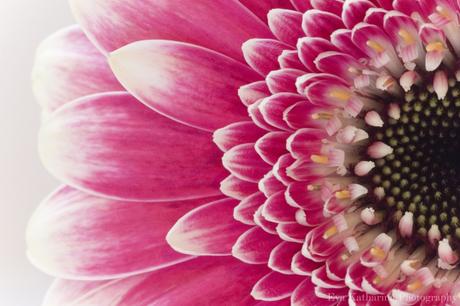
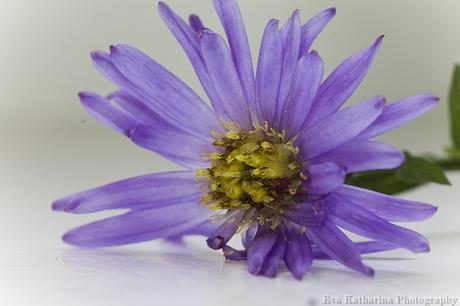 Blende/aperture:f11 Belichtung/exposure:2"5 ISO:100 Brennweite/focal length:105mm Blende/aperture: f11 Belichtung/exposure: 2"5 ISO:100Brennweite/focal length:105mm
2. Benutzt immer einen Fernauslöser
3. Benutzt eine so kleine ISO wie möglich
4. Und so hohe Blendenzahlen wie möglich
5. Macro Fotografie ist einfacher in einem Home Studio
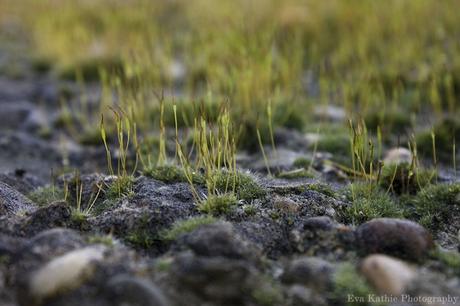
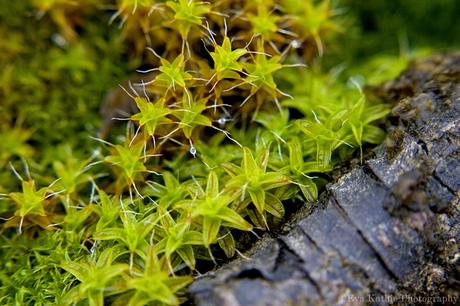
Für all die unter euch, die sich den Luxus eines Macro Objektives nicht leisten können - die Teile sind ja auch ganz schön teuer - würde ich Nahlinsen empfehlen. Diese können ein Macro Objektiv natürlich nicht ganz ersetzen, aber auch tolle Ergebnisse erzielen. Ich habe früher auf mein Kit Objektiv einfach eine 10x Nahlinse gesteckt und die Ergebnisse waren auch in Ordnung. Als Beispiel zeige ich euch noch zwei Bilder, die ich vor einer langen Weile mit Nahlinse und Kit Objektiv gemacht habe.
Zu letzt noch eine Macro Objektiv Empfehlung: für den etwas kleineren Geldbeutel - so wie meinen - bin ich sehr begeistert mit dem Sigma 105mm Objektiv, hätte ich etwas mehr Geld übrig gehabt hätte ich mir das 100mm Objektiv von Canon gekauft.
E Summary
1. Always use a tripod - or on the floor a Green Pod
2. Always use a remote release
3. As low as possible ISO
4. As high as possible aperture number
5. Macro photography is easier in a homestudio
For all of you that can't afford a macro lens - no surprise they are so expensive - I would recommend a close-up lens. They aren't as good as a macro lens but you can work with it and get some nice results. Before I had my lens I often used my kit lens with a 10x close-up lens and the photos were okay. For example the following two macro pictures are made with a close-up lens some time ago.
In the end a little macro lens advice: for the a little bit smaller purse I'm pretty happy with my 105mm lens by Sigma, if I had a little bit more money I would by the 100mm lens by Canon.
D Interessiert an Macro Fotografie? Einfach hier klicken um alle meine Macro Bilder zu sehen.E Interested in Macro Photography? Click here to see all my macro pictures.


Mein erster Tipp: versucht niemals Macro Fotos ohne ein Stativ zu machen. Ich musste das auf die harte Weise lernen. Ohne ein Stativ sind die Bilder nämlich meistens total verwackelt oder unscharf und man kann keine hohe Blendenzahl verwenden, was man aber für eine gute Tiefenschärfe braucht - dazu komme ich später noch mal. Also nochmal: immer wenn ihr Macro Fotos machen wollt, nehmt ein Stativ mit. Eine schöne Alternative dafür ist übrigens der "Green Pod", der vor allem für Fotos nah am Boden unschlagbar ist. Das ist quasi ein hartes Kissen auf das die Kamera geschnallt und festgeschraubt wird.
Das nächste was ihr für wirklich scharfe Bilder braucht ist ein Fernauslöser. Beim Macro Fotografieren ist die Kamera sehr empfindlich für Erschütterungen, sogar die winzig kleine die ihr macht, wenn ihr den Auslöser direkt an der Kamera drückt. Wenn ihr also richtig scharfe Bilder wollt, solltet ihr immer einen Fernauslöser zu diesem Zwecke benutzen. Glücklicherweise findet man davon billige Modelle z.B. auf amazon.
E When I started to do macro photography - well more when I first had my macro lens, the sigma 105mm fixed focal length - I was shocked: every picture I made was blurred and ugly. Before that I always thought the problem is, that I didn't have a macro lens and my superzoom lens is just not made for macro photography. But than I finally had this macro lens and the photos were even worse. When I asked other photographers what the problem is, it seemed like everybody knew how macro photography works, but nobody ever told me. So I think, now that I had some training in macro photography, tried everything and have an idea how it works, I want to tell you some little things that nobody ever told me but I would have loved if somebody did.
First of all: never ever try to photograph macro without a tripod. I had to learn this the hard way. Without a tripod the pictures are often blurred and you can't use a high aperture number, which you have to because you want to have a high depth of focus - what I will explain later in this post. So always take a tripod with you when you want to do macro photography. Another nice gadget that can replace a tripod for example when you do macro photography on the floor is the green pod.Which is some kind of hard pillow on that you can strap the camera.
Next thing you really need is a remote release. In macro photography the camera is really sensitive for shakes, even the one little shake you make, when you click the release of your camera. So if you want a really sharp picture you should use a remote release. Luckily there are pretty cheep models for example on amazon.

 D Nun haben wir die Basis des Ganzen, aber welche Kameraeinstellungen sind sinnvoll?
Mit einem Stativ - das ihr wie ich schon gesagt habe auf jeden Fall benutzen solltet - nehme ich auf jeden Fall immer die tiefste ISO - bei meiner Kamera ist das 100 -, damit spart ihr euch ein unnötiges Rauschen und mit dem Stativ müsst ihr auch nicht über die Belichtungszeit nachdenken. Das ist auch einer der Gründe weshalb ich Macro meist im AV Modus fotografiere - mehr über Kamera Modi findet ihr übrigens in einem meiner älteren Posts, hier. Der andere Grund ist, dass ich die Blende auf eine hohe Zahl setzen möchte, nämlich f11 oder sogar höher. Damit erzeugen wir eine hohe Tiefenschärfe, was bei Macro Fotografie richtig toll aussieht.
Und ich betone nochmal: wegen dem Fernauslöser und dem Stativ könnt ihr diese Einstellungen benutzen ohne über eine hohe Belichtungszeit nachzudenken, also macht euch keine Gedanken wenn die Kamera einige Zeit braucht um das Bild zu machen.
E Now we have the basis, but what camera settings should you use?
With a tripod - which you have to use like I already said - I always choose the lowest ISO of my camera which is 100, because than the picture don't have unnecessary noise and with a tripod you don't have to mind about the exposure time. That's also one reason why I always use the AV mode for macro photography - read more about camera modes in one of my older posts, here . The other reason is, that I want to set a aperture with a high number like f11 or even higher. With that setting we get a high depth of focus, which looks great at macro photography.
Because of the remote release and tripod you can do this setting without minding the long exposure time with this setting, so don't mind if the camera takes a lot of time to take a picture.


D Nächste Frage: Was tun, wenn sich das Motiv bewegt?
Das ist immer ein Problem, wenn man draußen Macros fotografieren möchte: wegen dem Wind bewegt sich die schöne Blume oder noch schlimmer: man möchte ein Tier fotografieren, z.B. eine Fliege. Also muss man die Einstellungen draußen natürlich anpassen, erstmal muss man die ISO erhöhen und dann die Blendenzahl kleiner werden lassen - aber nicht zu klein gehen, schließlich wollen wir in der Macro Fotografie eine hohe Tiefenschärfe. Mit diesen Einstellungen haben wir nun wahrscheinlich ein Rauschen im Bild und weniger Tiefenschärfe, das ist der Grund weshalb ich beispielsweise Blumen gerne drinnen in meinem improvisierten Studio fotografiere. Über mein eigenes kleines Studio habe ich vor einem kurzen Weilchen schonmal geschrieben, den Post findet ihr hier.
E The next question is: What do I do when my theme is moving?
That's always a problem when you do macro photography outside: because of wind the beautiful flower moves or you even want to photograph an moving animal like a fly. So you have to adjust the settings outside, you have to lower the aperture number - but don't go to low, because you want a high depth of focus in macro photography - and use a higher ISO. Than you may get some noise and less depth of focus, that's why I like to photograph flowers and stuff like that inside in a little homestudio. I already wrote a post about my personal little homestudio, have a look on it here.

 Blende/aperture:f11 Belichtung/exposure:2"5 ISO:100 Brennweite/focal length:105mm Blende/aperture: f11 Belichtung/exposure: 2"5 ISO:100Brennweite/focal length:105mm
 DZusammenfassung
1. Benutzt immer ein Stativ - oder auf dem Boden einen Green Pod2. Benutzt immer einen Fernauslöser
3. Benutzt eine so kleine ISO wie möglich
4. Und so hohe Blendenzahlen wie möglich
5. Macro Fotografie ist einfacher in einem Home Studio
Für all die unter euch, die sich den Luxus eines Macro Objektives nicht leisten können - die Teile sind ja auch ganz schön teuer - würde ich Nahlinsen empfehlen. Diese können ein Macro Objektiv natürlich nicht ganz ersetzen, aber auch tolle Ergebnisse erzielen. Ich habe früher auf mein Kit Objektiv einfach eine 10x Nahlinse gesteckt und die Ergebnisse waren auch in Ordnung. Als Beispiel zeige ich euch noch zwei Bilder, die ich vor einer langen Weile mit Nahlinse und Kit Objektiv gemacht habe.
Zu letzt noch eine Macro Objektiv Empfehlung: für den etwas kleineren Geldbeutel - so wie meinen - bin ich sehr begeistert mit dem Sigma 105mm Objektiv, hätte ich etwas mehr Geld übrig gehabt hätte ich mir das 100mm Objektiv von Canon gekauft.
E Summary
1. Always use a tripod - or on the floor a Green Pod
2. Always use a remote release
3. As low as possible ISO
4. As high as possible aperture number
5. Macro photography is easier in a homestudio
For all of you that can't afford a macro lens - no surprise they are so expensive - I would recommend a close-up lens. They aren't as good as a macro lens but you can work with it and get some nice results. Before I had my lens I often used my kit lens with a 10x close-up lens and the photos were okay. For example the following two macro pictures are made with a close-up lens some time ago.
In the end a little macro lens advice: for the a little bit smaller purse I'm pretty happy with my 105mm lens by Sigma, if I had a little bit more money I would by the 100mm lens by Canon.


D Interessiert an Macro Fotografie? Einfach hier klicken um alle meine Macro Bilder zu sehen.E Interested in Macro Photography? Click here to see all my macro pictures.


