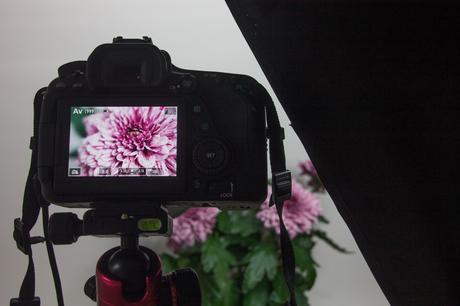
 D Vor einer halben Ewigkeit schon, habe ich mal angekündigt jetzt öfter Behind the Scenes Posts zu schreiben. Allerdings entpuppte sich das ganze schließlich als problematisch, denn wenn ich mit meiner Kamera Bilder mache, mit welcher Kamera sollen dann die Behind the Scenes Aufnahmen gemacht werden? Dieses Problem ist nun Dank der neuen Kamera ein für alle mal gelöst.
Heute möchte ich euch also endlich mal wieder hinter die Kulissen schauen lassen. Wer mir fleißig auf Instagram folgt, bekommt diese Ehre übrigens des öfteren sowohl auf dem Profil, als auch in der Story.
Heute zeige ich euch, wie die Aufnahmen vom letzten Macro Monday entstanden sind und zwar vom Home Studio aus bis hin zum fertigen Bild.
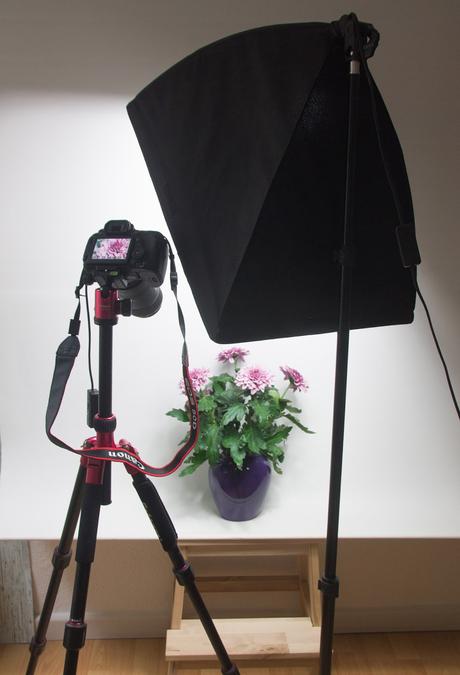
Mein Home Studio kennt ihr ja alle schon aus meinem Post "Low Budget: Home Studio II", dort habe ich erklärt wie es aufgebaut werden kann. Heute seht ihr es endlich mal im Einsatz. Viel dazu gekommen ist seit dem Tutorial-Post nicht, allerdings habe ich inzwischen meine alte Studio Lampe wieder ausgepackt. Diese habe ich vor einer halben Ewigkeit für gerade mal ca. 30€ auf Amazon
Außerdem verwende ich für fast alle Aufnahmen im Home Studio mein Stativ, damit ich die ISO auf 100 halten kann. Die genauen Exifs der Bilder habe ich euch schon im "Macro Monday X"-Post verraten.
E A little eternity ago I announced that I will do more Behind the Scenes posts, what in the end wasn't that easy. So if I took photos with my camera, with which camera should the behind the scenes pictures be made? Thanks to the new camera, this problem is solved now.
Those of you who are following my Instagram already pretty often see some ofthose behind the scenes in my profile or in the story. But today I finally want to let you look behind the scenes on this blog.
I brought some pictures that I made for my last letzten Macro Monday from the Home Studio to the finished picture.
You already know my home studio from the post "Low Budget: Home Studio II", there I told you how I build it and stuff like that. Today you will see it in action. The studio didn't really get bigger since the tutorial post, but I packed out my old studio lamp again, which I bought some time ago for only about 30€ at amazon
For most of the photos I make in my home studio I also use my tripod, so I don't have to go over ISO 100. I already told you the exact Exifs these pictures in the "Macro Monday X"-Post.


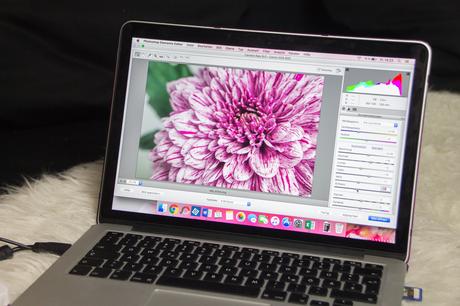
D Von der Speicherkarte kommen die Bilder dann natürlich auf den PC. Ich schieße alle meine Bilder im RAW-Format und arbeite seit nun ungefähr einem Dreiviertel Jahr mit einem MacBook Pro - wozu ich hier schonmal berichtet habe - und Photoshop Elements 13. Die ganze Creative Suite zu haben wäre natürlich cooler, aber alles in allem bin ich mit Photoshop Elements sehr zufrieden. Dort gehen die Bilder dann erstmal in die RAW-Entwicklung, wo man allerlei Sachen einstellen kann. Was man dort alles machen kann und wieso ich das RAW-Format JPEG vorziehe habe ich vor einer Weile in einem anderen Blogpost berichtet, diesen findest du hier.
Bei Macro Aufnahmen ist nach der RAW-Entwicklung meistens schon Schluss mit der Bearbeitung und ich bin zufrieden mit dem Bild. Bei Landschafts- oder People Fotografien wird oft noch etwas weiter bearbeitet, aber das erzähle bzw. zeige ich euch ein andermal. Bei Macro Aufnahmen kommt dann meistens nur noch meine Signatur aufs Bild und schließlich kann es fürs Web optimiert und hochgeladen werden.
Na was sagst du, interessierst du dich für Behind the Scenes? Möchtest du mehr davon sehen?
Ich überlege in Zukunft vielleicht auch mal ein paar Videos zu drehen.
E From the memory card the pictures are transferred on my computer. I take all my pictures in RAW-Format and since nearly a year I'm editing them on my MacBook Pro - I already told you something about it here - with Photoshop Elements 13. The whole Creative Suite would be cooler, but I'm pretty happy with Photoshop Elements.
I always start with the RAW-development, were you can set a lot of different things. I already told you in an older blogpost you can do with RAW-Format and and why I prefer it, you can read it here.
When I edit macro pictures the RAW-development is enough most of the time and I'm happy with the picture. With landscape or people photography it's more complicated, but I will tell or show you another time. In the end the macro picture just gets it's signature and can be uploaded.
So what do you think about Behind the Scenes posts? Do you want to see more of it?
I'm also thinking about making some videos in the future.


